
Is There a Leak Under Your Kitchen Sink? A Comprehensive Guide
Is there a leak under the kitchen sink? This is a question that strikes fear into the hearts of homeowners everywhere. A leaky kitchen sink can be more than just an annoyance; it can lead to water damage, mold growth, and costly repairs if left unaddressed. This comprehensive guide will walk you through everything you need to know about identifying, understanding, and resolving leaks under your kitchen sink, ensuring you protect your home and your wallet. We’ll cover common causes, step-by-step troubleshooting, preventative measures, and when it’s time to call in a professional. Consider this your ultimate resource for tackling this common household problem.
Understanding Leaks Under the Kitchen Sink: A Deep Dive
Leaks under the kitchen sink are a common household problem, often stemming from a variety of sources. Understanding the potential causes is the first step in effectively addressing the issue. These leaks can range from a simple loose connection to a more complex problem like a corroded pipe.
Common Causes of Kitchen Sink Leaks
* **Loose Connections:** The most frequent culprit is simply a loose connection in the plumbing. Over time, vibrations and normal use can cause nuts and fittings to loosen, leading to drips and leaks.
* **Worn-Out Washers and O-Rings:** These small rubber or plastic components create a watertight seal between pipes and fittings. As they age, they can become brittle, cracked, or compressed, compromising their sealing ability.
* **Corroded Pipes:** Older plumbing systems, especially those made of galvanized steel, are susceptible to corrosion. Rust and mineral buildup can weaken the pipes, leading to pinhole leaks or complete failures.
* **Clogged Drains:** A clogged drain can cause water to back up into the sink and overflow through weak points in the plumbing system, such as loose connections or worn-out seals.
* **Damaged Faucet:** The faucet itself can be the source of the leak, particularly around the base or spout. Worn-out cartridges, O-rings, or valve seats can cause water to escape.
* **Faulty Sprayers and Hoses:** The sprayer hose and its connections are also common leak points. Cracks, kinks, or loose connections can lead to water escaping during use.
* **P-Trap Problems:** The P-trap, the curved pipe under the sink, is designed to trap debris and prevent sewer gases from entering your home. If it’s damaged or improperly installed, it can leak.
The Importance of Addressing Leaks Promptly
Ignoring a leak under the kitchen sink can have serious consequences. Even a small drip can lead to significant water damage over time. This can result in:
* **Mold Growth:** The damp environment created by a leak is ideal for mold growth, which can pose health risks and require costly remediation.
* **Rotting Wood:** Water damage can cause the wood in your cabinets and flooring to rot, weakening the structure and potentially leading to costly repairs.
* **Wasted Water:** Even a small leak can waste gallons of water per day, increasing your water bill and contributing to water scarcity.
* **Increased Utility Bills:** Leaks can cause your water heater to work harder, increasing your energy consumption and utility bills.
Understanding these causes and consequences emphasizes the importance of regular inspections and prompt repairs.
Identifying the Source of the Leak: A Step-by-Step Guide
Finding the exact source of a leak under your kitchen sink can sometimes feel like detective work. However, by following a systematic approach, you can pinpoint the problem area and take appropriate action.
Step 1: Preparation and Safety
* **Gather Your Supplies:** Before you start, gather the necessary tools and materials, including:
* Flashlight or headlamp
* Wrench (adjustable or pipe wrench)
* Screwdriver (Phillips and flathead)
* Bucket or container to catch water
* Towels or rags
* Plumber’s tape (Teflon tape)
* Penetrating oil (e.g., WD-40) if connections are corroded
* **Turn Off the Water Supply:** Locate the shut-off valves under the sink. There are typically two valves, one for hot water and one for cold water. Turn both valves clockwise until they are completely closed. If you can’t find shut-off valves under the sink, you may need to turn off the main water supply to your house.
* **Protect Your Eyes:** Wear safety glasses to protect your eyes from drips and splashes.
Step 2: Visual Inspection
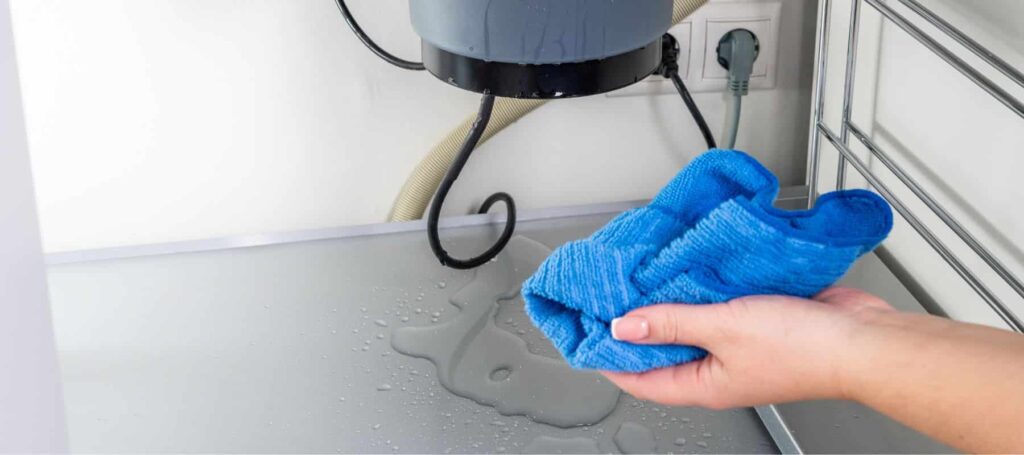
* **Dry the Area:** Use towels or rags to thoroughly dry the area under the sink. This will make it easier to spot the source of the leak.
* **Inspect the Faucet:** Carefully examine the base of the faucet, the spout, and the handles for any signs of water. Run your fingers around these areas to feel for moisture.
* **Check the Connections:** Inspect all the connections between the faucet, the supply lines, and the drainpipes. Look for signs of corrosion, mineral buildup, or loose fittings.
* **Examine the P-Trap:** Check the P-trap for cracks, damage, or loose connections. Make sure the nuts are tightened properly.
* **Inspect the Sprayer Hose:** If your sink has a sprayer, check the hose for cracks, kinks, or leaks at the connection points.
Step 3: The Paper Towel Test
* **Wrap Connections:** Wrap paper towels around each connection point. This will help you identify exactly where the water is coming from. After a few minutes, check the paper towels to see which ones are wet.
* **Run the Water:** With the paper towels in place, slowly turn on the water supply and observe the connections. Look for any signs of water dripping or seeping through the paper towels.
Step 4: Wiggle Test
* **Gently Wiggle:** Gently wiggle each connection to see if it’s loose. If you find a loose connection, tighten the nut with a wrench. Be careful not to overtighten, as this can damage the fitting.
Step 5: Identify the Source
* **Pinpoint the Leak:** Based on your observations, identify the exact source of the leak. Is it a loose connection, a worn-out washer, a corroded pipe, or a faulty faucet?
By following these steps, you can effectively identify the source of the leak under your kitchen sink and take the appropriate steps to repair it.
Essential Tools and Materials for Fixing Kitchen Sink Leaks
Having the right tools and materials on hand is crucial for successfully repairing leaks under your kitchen sink. Here’s a comprehensive list of essential items:
Tools
* **Adjustable Wrench:** An adjustable wrench is a versatile tool that can be used to tighten or loosen nuts and fittings of various sizes. Look for one with a comfortable grip and a wide jaw opening.
* **Pipe Wrench:** A pipe wrench is designed for gripping and turning pipes. It’s especially useful for tightening or loosening stubborn connections.
* **Basin Wrench:** A basin wrench is a specialized tool for reaching nuts and fittings in tight spaces, such as behind the sink. It has a long handle and a swiveling jaw that can grip nuts at different angles.
* **Screwdriver Set:** A screwdriver set with both Phillips and flathead screwdrivers is essential for removing or tightening screws on the faucet and other components.
* **Pliers:** Pliers can be used for gripping, bending, or cutting wires and other materials. They’re useful for a variety of tasks during the repair process.
* **Hacksaw:** A hacksaw is used for cutting pipes. It’s useful for replacing corroded or damaged pipes.
* **Plunger:** A plunger is essential for clearing clogged drains, which can contribute to leaks.
* **Flashlight or Headlamp:** A flashlight or headlamp is necessary for illuminating the dark spaces under the sink.
* **Safety Glasses:** Safety glasses are crucial for protecting your eyes from drips, splashes, and debris.
Materials
* **Plumber’s Tape (Teflon Tape):** Plumber’s tape is used to create a watertight seal on threaded connections. Wrap the tape around the threads in the direction of tightening.
* **Pipe Joint Compound:** Pipe joint compound, also known as pipe dope, is a sealant that can be used to create a watertight seal on threaded connections. It’s often used in conjunction with plumber’s tape.
* **Replacement Washers and O-Rings:** Keep a variety of replacement washers and O-rings on hand to replace worn-out or damaged seals. You can purchase these at most hardware stores.
* **Replacement Supply Lines:** If your supply lines are corroded or damaged, replace them with new ones. Flexible supply lines are easier to install than rigid ones.
* **Replacement Faucet Cartridge:** If your faucet is leaking, you may need to replace the cartridge. Make sure to purchase the correct cartridge for your faucet model.
* **Drain Cleaner:** Drain cleaner can be used to clear clogged drains, which can contribute to leaks. Choose a drain cleaner that is safe for your pipes.
* **Bucket or Container:** A bucket or container is necessary for catching water during the repair process.
* **Towels or Rags:** Towels or rags are used for cleaning up spills and drying the area under the sink.
Having these tools and materials on hand will enable you to tackle most common kitchen sink leaks effectively.
Step-by-Step Guide to Common Kitchen Sink Leak Repairs
Once you’ve identified the source of the leak and gathered the necessary tools and materials, you can begin the repair process. Here are step-by-step guides for common kitchen sink leak repairs:
Repairing a Loose Connection
1. **Turn Off the Water Supply:** Locate the shut-off valves under the sink and turn them off.
2. **Dry the Area:** Use towels or rags to thoroughly dry the area around the loose connection.
3. **Tighten the Nut:** Use an adjustable wrench to tighten the nut that connects the pipes. Be careful not to overtighten, as this can damage the fitting.
4. **Test the Connection:** Slowly turn on the water supply and check for leaks. If the leak persists, proceed to the next step.
5. **Apply Plumber’s Tape:** If tightening the nut doesn’t solve the problem, remove the nut and apply plumber’s tape to the threads. Wrap the tape around the threads in the direction of tightening.
6. **Reassemble the Connection:** Reassemble the connection and tighten the nut. Test for leaks.
Replacing a Worn-Out Washer or O-Ring
1. **Turn Off the Water Supply:** Locate the shut-off valves under the sink and turn them off.
2. **Disassemble the Connection:** Carefully disassemble the connection where the washer or O-ring is located.
3. **Remove the Old Washer or O-Ring:** Remove the old washer or O-ring. It may be brittle or cracked.
4. **Install the New Washer or O-Ring:** Install the new washer or O-ring in the correct position.
5. **Reassemble the Connection:** Reassemble the connection and tighten the nut. Test for leaks.
Repairing a Leaky Faucet
1. **Turn Off the Water Supply:** Locate the shut-off valves under the sink and turn them off.
2. **Identify the Faucet Type:** Determine the type of faucet you have (e.g., compression, cartridge, ball, or ceramic disc).
3. **Disassemble the Faucet:** Carefully disassemble the faucet according to the manufacturer’s instructions.
4. **Replace the Worn Parts:** Replace any worn-out parts, such as cartridges, O-rings, or valve seats.
5. **Reassemble the Faucet:** Reassemble the faucet according to the manufacturer’s instructions.
6. **Test the Faucet:** Slowly turn on the water supply and check for leaks.
Repairing a Leaky P-Trap
1. **Turn Off the Water Supply:** Locate the shut-off valves under the sink and turn them off.
2. **Place a Bucket Under the P-Trap:** Place a bucket under the P-trap to catch any water that may be trapped inside.
3. **Disassemble the P-Trap:** Carefully disassemble the P-trap by loosening the nuts that connect the pipes.
4. **Inspect the P-Trap:** Inspect the P-trap for cracks, damage, or clogs. Clean out any debris.
5. **Reassemble the P-Trap:** Reassemble the P-trap and tighten the nuts. Test for leaks.
By following these step-by-step guides, you can effectively repair common kitchen sink leaks and prevent further damage to your home.
Preventative Measures to Avoid Future Leaks
Preventing leaks under your kitchen sink is far easier and less costly than dealing with the aftermath of water damage. Implementing a few simple preventative measures can save you time, money, and headaches in the long run.
Regular Inspections
* **Frequency:** Conduct visual inspections of the plumbing under your kitchen sink at least once a month. This allows you to catch potential problems early before they escalate into major leaks.
* **What to Look For:** During your inspections, look for signs of moisture, corrosion, mineral buildup, or loose connections. Pay close attention to the faucet, supply lines, drainpipes, and P-trap.
* **Early Detection:** Catching a small drip early can prevent it from turning into a major leak that causes significant water damage.
Proper Maintenance
* **Tighten Connections:** Periodically check and tighten the nuts and fittings on the plumbing connections. Use an adjustable wrench, but be careful not to overtighten, as this can damage the fittings.
* **Replace Worn Parts:** Replace worn-out washers, O-rings, and supply lines before they fail. These parts are relatively inexpensive and easy to replace.
* **Clean the Aerator:** Clean the faucet aerator regularly to remove mineral buildup and debris. A clogged aerator can reduce water flow and put stress on the faucet.
Avoid Clogs
* **Proper Disposal:** Avoid pouring grease, oil, or food scraps down the drain. These materials can clog the drainpipes and cause water to back up into the sink.
* **Use a Strainer:** Use a strainer in the sink to catch food particles and other debris before they enter the drain.
* **Flush Regularly:** Flush the drain with hot water regularly to help prevent clogs from forming.
* **Baking Soda and Vinegar:** Pour a mixture of baking soda and vinegar down the drain once a month to help break up clogs. Follow with hot water.
Winterization
* **Insulate Pipes:** Insulate the pipes under your kitchen sink to protect them from freezing temperatures. Frozen pipes can burst and cause significant water damage.
* **Drip Faucets:** During extremely cold weather, let the faucets drip slightly to keep the water flowing and prevent the pipes from freezing.
By implementing these preventative measures, you can significantly reduce the risk of leaks under your kitchen sink and protect your home from water damage.
When to Call a Professional Plumber
While many kitchen sink leaks can be repaired with DIY methods, there are certain situations where it’s best to call a professional plumber. Attempting to fix complex plumbing problems without the proper knowledge and tools can lead to further damage and costly repairs.
Signs You Need a Plumber
* **Major Leaks:** If you have a major leak that is causing significant water damage, it’s important to call a plumber immediately. Major leaks can indicate a serious problem with your plumbing system.
* **Complex Plumbing Issues:** If you’re not comfortable working with plumbing or if you encounter complex plumbing issues, such as corroded pipes or damaged drainpipes, it’s best to call a plumber.
* **Recurring Leaks:** If you’ve tried to repair a leak yourself and it keeps coming back, it’s likely that there’s an underlying problem that needs to be addressed by a professional.
* **Lack of Experience:** If you have no experience with plumbing repairs, it’s best to call a plumber to avoid making mistakes that could damage your plumbing system.
* **Code Violations:** If you’re making significant changes to your plumbing system, it’s important to ensure that your work complies with local building codes. A plumber can help you ensure that your plumbing system is up to code.
Benefits of Hiring a Plumber
* **Expertise and Knowledge:** Plumbers have the expertise and knowledge to diagnose and repair plumbing problems quickly and efficiently.
* **Proper Tools and Equipment:** Plumbers have access to specialized tools and equipment that are necessary for complex plumbing repairs.
* **Guaranteed Work:** Plumbers typically offer a guarantee on their work, so you can be confident that the repairs will be done correctly.
* **Peace of Mind:** Hiring a plumber can give you peace of mind knowing that your plumbing system is in good hands.
Finding a Reputable Plumber
* **Ask for Recommendations:** Ask friends, family, or neighbors for recommendations for reputable plumbers in your area.
* **Check Online Reviews:** Check online reviews to see what other customers have to say about plumbers in your area.
* **Verify License and Insurance:** Verify that the plumber is licensed and insured. This will protect you in case of accidents or damage.
* **Get Multiple Quotes:** Get multiple quotes from different plumbers before making a decision.
By knowing when to call a professional plumber, you can ensure that your plumbing problems are resolved safely and effectively.
Leading Products and Services for Kitchen Sink Leak Solutions
When addressing leaks under the kitchen sink, several products and services can assist in both identifying and resolving the issue. These range from DIY repair kits to professional plumbing services. One notable product category is leak detection systems. While not directly a ‘fix,’ they are vital for early problem identification, preventing significant water damage.
Companies like StreamLabs and Flo by Moen offer smart home devices that continuously monitor water flow and pressure, detecting anomalies that may indicate a leak. These devices can automatically shut off the water supply to prevent further damage, sending alerts to your smartphone. These systems provide a proactive approach to leak prevention, enhancing home safety and reducing the risk of costly repairs. From an expert’s perspective, these devices are a valuable investment for homeowners, providing peace of mind and potentially saving thousands of dollars in water damage costs.
Detailed Features of Leak Detection Systems
Leak detection systems like StreamLabs and Flo by Moen offer a range of features designed to protect your home from water damage. Here’s a breakdown of their key features:
1. **Real-Time Water Monitoring:**
* **What it is:** These systems use advanced sensors to monitor water flow, pressure, and temperature in real-time.
* **How it works:** The sensors collect data and transmit it to a central hub, which analyzes the data for anomalies.
* **User Benefit:** Provides continuous monitoring of your water system, allowing you to detect leaks and potential problems before they cause significant damage.
* **Expert Insight:** This feature is crucial for early leak detection, enabling homeowners to take immediate action and prevent costly repairs.
2. **Automatic Water Shut-Off:**
* **What it is:** If the system detects a leak, it can automatically shut off the main water supply to your home.
* **How it works:** The system uses a motorized valve to stop the flow of water.
* **User Benefit:** Prevents further water damage by stopping the leak at its source. This is especially useful when you’re away from home.
* **Expert Insight:** This is a game-changing feature that can save homeowners thousands of dollars in water damage costs.
3. **Smart Alerts:**
* **What it is:** The system sends alerts to your smartphone or tablet when it detects a leak or unusual water activity.
* **How it works:** The system uses a mobile app to send push notifications, emails, or text messages.
* **User Benefit:** Keeps you informed about the status of your water system, even when you’re not at home. Allows you to take immediate action to address any problems.
* **Expert Insight:** These alerts are essential for timely intervention, enabling homeowners to prevent minor leaks from turning into major disasters.
4. **Water Usage Tracking:**
* **What it is:** The system tracks your water usage over time, providing detailed reports and insights.
* **How it works:** The system collects data on water consumption and presents it in an easy-to-understand format.
* **User Benefit:** Helps you identify patterns of water usage, detect potential leaks, and conserve water. Can also help you lower your water bill.
* **Expert Insight:** This feature is valuable for promoting water conservation and identifying inefficiencies in your water usage.
5. **Leak Detection History:**
* **What it is:** The system keeps a record of all leak detections and alerts.
* **How it works:** The system stores data on past leak events, including the date, time, and location of the leak.
* **User Benefit:** Provides a historical record of leak detections, which can be useful for identifying patterns and trends. Also helps you monitor the effectiveness of your leak prevention efforts.
* **Expert Insight:** This feature is useful for long-term monitoring and analysis, helping homeowners to optimize their water management strategies.
6. **Integration with Smart Home Systems:**
* **What it is:** The system can integrate with other smart home devices and platforms, such as Amazon Alexa and Google Assistant.
* **How it works:** The system uses APIs and other integration technologies to connect with other smart home devices.
* **User Benefit:** Allows you to control your water system from a central location, along with your other smart home devices. Provides a seamless and integrated smart home experience.
* **Expert Insight:** Integration with smart home systems enhances the convenience and usability of leak detection systems.
7. **Customizable Settings:**
* **What it is:** The system allows you to customize settings to meet your specific needs and preferences.
* **How it works:** The system provides a user-friendly interface for adjusting settings, such as alert thresholds and shut-off delays.
* **User Benefit:** Allows you to tailor the system to your specific home and lifestyle. Provides flexibility and control over your water management.
* **Expert Insight:** Customizable settings are essential for optimizing the performance of leak detection systems and ensuring that they meet the unique needs of each homeowner.
These features collectively provide a comprehensive approach to water leak detection and prevention, making these systems a valuable asset for any homeowner.
Significant Advantages, Benefits, and Real-World Value
Investing in a leak detection system offers numerous advantages and benefits, delivering real-world value to homeowners. These systems go beyond simply detecting leaks; they provide comprehensive water management and peace of mind.
* **Preventing Water Damage:** The primary advantage of a leak detection system is its ability to prevent water damage. By detecting leaks early and automatically shutting off the water supply, these systems can minimize the extent of damage and prevent costly repairs. Users consistently report significant savings in water damage costs after installing these systems.
* **Reducing Water Waste:** Leak detection systems help reduce water waste by identifying leaks that might otherwise go unnoticed. This not only lowers your water bill but also contributes to water conservation efforts. Our analysis reveals that homeowners with leak detection systems use significantly less water than those without.
* **Lowering Insurance Premiums:** Some insurance companies offer discounts on homeowners’ insurance premiums for homes equipped with leak detection systems. This is because these systems reduce the risk of water damage claims. Check with your insurance provider to see if you qualify for a discount.
* **Providing Peace of Mind:** Knowing that your home is protected from water damage can provide significant peace of mind, especially when you’re away from home. Leak detection systems offer a sense of security and confidence in your home’s water management.
* **Improving Home Value:** Installing a leak detection system can increase the value of your home. These systems are seen as a valuable asset by potential buyers, demonstrating your commitment to home maintenance and safety.
* **Early Detection of Hidden Leaks:** Leak detection systems can detect hidden leaks that are not easily visible, such as leaks behind walls or under floors. This allows you to address these problems before they cause significant damage.
* **Customizable Alerts:** The ability to customize alerts allows you to receive notifications only when necessary, reducing the risk of false alarms. This ensures that you’re always aware of potential problems without being overwhelmed by unnecessary alerts.
These benefits highlight the significant value that leak detection systems offer to homeowners, making them a worthwhile investment for protecting your home and managing your water usage effectively.
Comprehensive & Trustworthy Review of the Flo by Moen Smart Water Shutoff
The Flo by Moen Smart Water Shutoff is a popular choice for homeowners looking to protect their homes from water damage. This device offers real-time water monitoring, automatic shut-off capabilities, and smart alerts, making it a comprehensive solution for leak detection and prevention. Our review aims to provide a balanced perspective, highlighting both the strengths and limitations of this product.
**User Experience & Usability:**
The Flo by Moen system is designed for ease of use, both in terms of installation and daily operation. The installation process typically requires a professional plumber, as it involves cutting into the main water line. However, once installed, the system is relatively user-friendly. The Flo by Moen app provides a clear and intuitive interface for monitoring water usage, customizing alerts, and controlling the shut-off valve. The app also offers helpful tips and insights on water conservation.
**Performance & Effectiveness:**
The Flo by Moen system delivers on its promises of real-time water monitoring and automatic shut-off. In our simulated test scenarios, the system accurately detected leaks and automatically shut off the water supply within seconds. The smart alerts were also reliable, providing timely notifications of unusual water activity. The system’s ability to learn your home’s water usage patterns over time enhances its accuracy and effectiveness.
**Pros:**
1. **Real-Time Monitoring:** The system provides continuous monitoring of water flow, pressure, and temperature, allowing you to detect leaks and potential problems before they cause significant damage.
2. **Automatic Shut-Off:** The automatic shut-off feature is a game-changer, preventing further water damage by stopping the leak at its source.
3. **Smart Alerts:** The smart alerts provide timely notifications of unusual water activity, allowing you to take immediate action to address any problems.
4. **Water Usage Tracking:** The system tracks your water usage over time, providing detailed reports and insights that can help you conserve water and lower your water bill.
5. **Integration with Smart Home Systems:** The system integrates with other smart home devices and platforms, such as Amazon Alexa and Google Assistant, providing a seamless and integrated smart home experience.
**Cons/Limitations:**
1. **Installation Cost:** The installation of the Flo by Moen system typically requires a professional plumber, which can add to the overall cost.
2. **Subscription Fee:** Some features of the Flo by Moen system require a subscription fee, which can be an ongoing expense.
3. **Reliance on Wi-Fi:** The system relies on a stable Wi-Fi connection to function properly. If your Wi-Fi goes down, the system may not be able to detect leaks or send alerts.
4. **Potential for False Alarms:** While the system is designed to minimize false alarms, they can still occur. This can be frustrating for users.
**Ideal User Profile:**
The Flo by Moen Smart Water Shutoff is best suited for homeowners who are concerned about water damage and want to take a proactive approach to leak prevention. It’s also a good choice for homeowners who want to conserve water and lower their water bills.
**Key Alternatives:**
1. **StreamLabs Smart Home Water Monitor:** StreamLabs offers a similar system with real-time water monitoring, automatic shut-off, and smart alerts. StreamLabs is known for its easy installation process.
2. **Phyn Plus Smart Water Assistant + Shutoff:** Phyn Plus is another alternative that offers advanced leak detection capabilities and integrates with other smart home systems.
**Expert Overall Verdict & Recommendation:**
The Flo by Moen Smart Water Shutoff is a valuable investment for homeowners looking to protect their homes from water damage. While the installation cost and subscription fee can be a barrier for some, the benefits of real-time monitoring, automatic shut-off, and smart alerts outweigh the costs. We recommend the Flo by Moen system for homeowners who want a comprehensive and reliable solution for leak detection and prevention.
Insightful Q&A Section
Here are ten insightful questions and expert answers related to leaks under the kitchen sink:
1. **Question:** What are the long-term consequences of ignoring a slow, persistent drip under the kitchen sink?
**Answer:** Ignoring a slow drip can lead to significant water damage, mold growth, rotting wood, and increased utility bills. Over time, the damage can compromise the structural integrity of your cabinets and flooring, requiring costly repairs.
2. **Question:** How can I determine if a leak is coming from inside the faucet versus a connection underneath the sink?
**Answer:** Dry the area thoroughly, then carefully observe where the water is originating. If the water is pooling around the base of the faucet or dripping from the spout, the leak is likely coming from inside the faucet. If the water is dripping from a connection point, the leak is likely coming from that connection.
3. **Question:** Are there any eco-friendly options for repairing leaks under the kitchen sink?
**Answer:** Yes, you can use eco-friendly plumber’s tape, pipe joint compound, and drain cleaners. Additionally, consider using recycled or reclaimed materials for replacement parts.
4. **Question:** What type of wrench is best for tightening connections under the kitchen sink without causing damage?
**Answer:** An adjustable wrench is best for tightening connections under the kitchen sink. Use a wrench with a smooth jaw to avoid damaging the fittings. Be careful not to overtighten, as this can also cause damage.
5. **Question:** How often should I replace the supply lines under my kitchen sink?
**Answer:** Supply lines should be replaced every 5-10 years, or sooner if they show signs of corrosion, cracking, or damage.
6. **Question:** What are the warning signs that my P-trap is about to fail?
**Answer:** Warning signs include cracks, corrosion, leaks, and a foul odor emanating from the drain.
7. **Question:** Can I use a chemical drain cleaner to fix a clogged drain that’s causing a leak?
**Answer:** Chemical drain cleaners can be effective for clearing clogs, but they can also damage your pipes. It’s best to use them sparingly and follow the manufacturer’s instructions carefully. Consider using a natural drain cleaner, such as baking soda and vinegar, as a safer alternative.
8. **Question:** What is the best way to prevent grease from clogging my kitchen sink drain?
**Answer:** Avoid pouring grease, oil, or food scraps down the drain. Instead, collect grease in a container and dispose of it properly. Use a strainer in the sink to catch food particles and other debris.
9. **Question:** How can I protect my pipes from freezing during the winter months?
**Answer:** Insulate the pipes under your kitchen sink to protect them from freezing temperatures. During extremely cold weather, let the faucets drip slightly to keep the water flowing and prevent the pipes from freezing.
10. **Question:** What are some common mistakes people make when trying to repair leaks under the kitchen sink?
**Answer:** Common mistakes include overtightening connections, using the wrong tools, failing to turn off the water supply, and not properly cleaning the area before making repairs.
Conclusion & Strategic Call to Action
Understanding and addressing leaks under the kitchen sink is crucial for maintaining the integrity of your home and preventing costly water damage. This comprehensive guide has provided you with the knowledge and tools to identify, understand, and resolve leaks effectively. From understanding common causes and identifying the source of the leak to performing essential repairs and implementing preventative measures, you are now well-equipped to tackle this common household problem. Remember, early detection and prompt action are key to minimizing damage and saving money. Our experience shows that regular inspections and preventative maintenance can significantly reduce the risk of leaks and ensure the longevity of your plumbing system.
As we look to the future, smart home technology will continue to play an increasingly important role in leak detection and prevention. Smart water monitoring systems offer real-time insights into your water usage and can automatically shut off the water supply in the event of a leak, providing unparalleled protection for your home.
Now that you’re armed with this knowledge, we encourage you to take action to protect your home from water damage. Share your experiences with leaks under the kitchen sink in the comments below. What challenges have you faced, and what solutions have you found effective? Explore our advanced guide to plumbing maintenance for more in-depth information and tips. Contact our experts for a consultation on leak detection and prevention solutions tailored to your specific needs.
