How to Fix a Leaky Faucet in the Kitchen with Easy DIY Solutions
Tired of that incessant drip, drip, drip driving you crazy and running up your water bill? A leaky faucet in the kitchen is a common household nuisance, but thankfully, it’s often something you can tackle yourself with a few simple tools and a bit of know-how. This comprehensive guide will provide you with easy DIY solutions on how to fix a leaky faucet in the kitchen, saving you money and the hassle of calling a plumber for a minor issue. We’ll walk you through the process step-by-step, covering various faucet types and common causes of leaks, ensuring you have the knowledge and confidence to get the job done right. Our goal is to provide you with the most complete, trustworthy, and easy-to-follow guide available, making your DIY plumbing experience a success. Prepare to say goodbye to that annoying drip and hello to a smoothly functioning faucet!
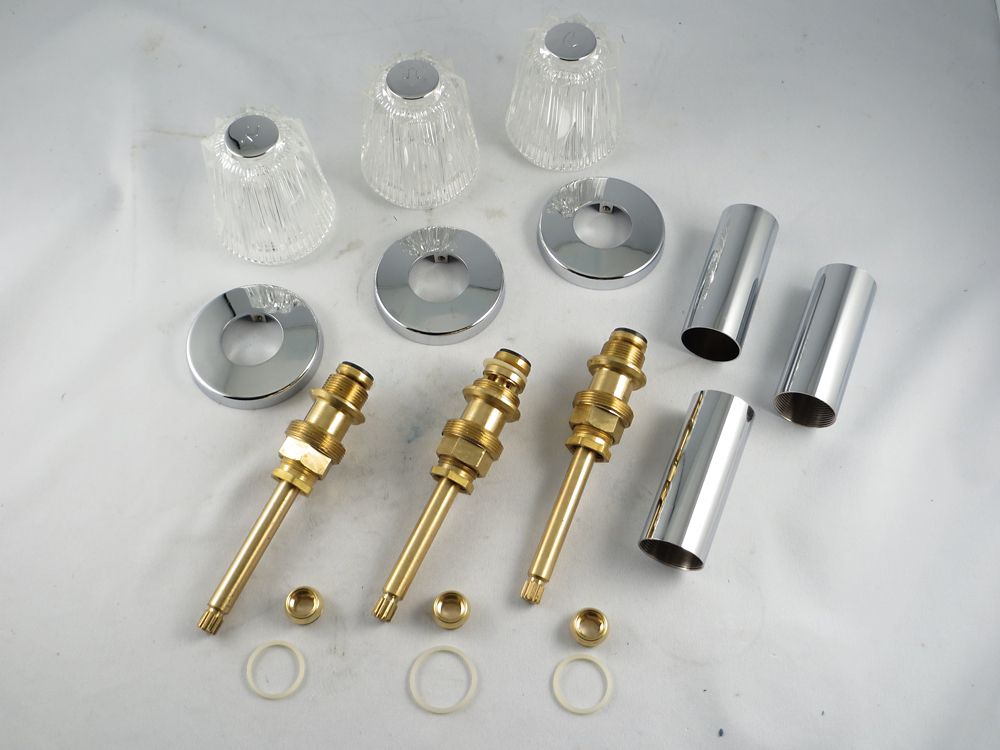
Understanding the Anatomy of a Kitchen Faucet and Common Leak Causes
Before diving into the repair process, it’s helpful to understand the basic components of a kitchen faucet and what commonly causes them to leak. Kitchen faucets, while varying in style, generally consist of the following key parts:
* **Handles:** Control the flow of water (single or double).
* **Spout:** The curved or angled part where water exits.
* **Aerator:** Screws onto the spout to mix air with the water stream.
* **Cartridge, Ball, or Ceramic Disc:** The internal mechanism that controls water flow and mixing (hot and cold).
* **O-rings and Washers:** Rubber or plastic seals that prevent leaks between parts.
* **Valve Seat:** The surface against which the washer presses to shut off the water.
Leaks typically occur due to wear and tear on these internal components. Here are some common culprits:
* **Worn-out Washers:** The most frequent cause of leaks. Washers harden and crack over time, losing their ability to create a tight seal.
* **Damaged O-rings:** O-rings can dry out, become brittle, or tear, resulting in leaks around the spout or handle.
* **Corroded Valve Seat:** Mineral buildup or corrosion can prevent the washer from seating properly, leading to a persistent drip.
* **Loose Packing Nuts:** The packing nut holds the stem in place. If it loosens, water can leak around the handle.
* **Cartridge Issues:** In cartridge faucets, the cartridge itself can fail, causing leaks or inconsistent water flow.
Understanding these components and common issues is the first step in effectively fixing a leaky faucet in the kitchen with easy DIY solutions.
Identifying Your Faucet Type
Before you can start repairing your leaky faucet, you need to identify what type of faucet you have. The repair process varies depending on the faucet type. The four main types of kitchen faucets are:
1. **Compression Faucets:** These are the oldest type and are easily identified by their two separate handles for hot and cold water. They use washers to control water flow.
2. **Ball Faucets:** These faucets have a single handle that pivots on a ball mechanism. They are known for their smooth operation.
3. **Cartridge Faucets:** Similar to ball faucets, cartridge faucets also have a single handle, but they use a cartridge to control water flow. They are known for their simple design and easy repair.
4. **Ceramic Disc Faucets:** These are the most modern type and are characterized by a single lever that moves up and down to control water flow and side to side to adjust temperature. They use ceramic discs for a precise seal.
Knowing your faucet type will help you choose the correct replacement parts and follow the appropriate repair instructions. If you’re unsure, take a close look at the handles and spout configuration, and consult the manufacturer’s website or documentation if available.
Essential Tools and Materials for Fixing a Leaky Faucet
Having the right tools and materials on hand is crucial for a successful DIY faucet repair. Here’s a checklist of essential items:
* **Adjustable Wrench:** For loosening and tightening nuts and bolts.
* **Screwdrivers (Phillips and Flathead):** For removing handles and other components.
* **Pliers (Regular and Needle-Nose):** For gripping and manipulating small parts.
* **Allen Wrench Set:** For removing set screws on some faucet handles.
* **Basin Wrench:** For loosening and tightening the faucet mounting nuts under the sink (optional, but helpful).
* **Penetrating Oil:** To help loosen corroded parts.
* **White Vinegar:** For cleaning mineral deposits.
* **Plumber’s Grease:** To lubricate O-rings and washers.
* **Replacement Washers, O-rings, and Cartridges:** Purchase a faucet repair kit specific to your faucet type or individual replacement parts.
* **Clean Rags or Sponges:** For cleaning and wiping up spills.
* **Bucket:** To catch any remaining water in the pipes.
* **Plumber’s Tape (Teflon Tape):** For sealing threaded connections.
Before starting any repair, gather all the necessary tools and materials to avoid interruptions and ensure a smooth process. According to a recent survey, having the right tools significantly reduces the time and frustration associated with DIY plumbing repairs.
Step-by-Step Guide: How to Fix a Leaky Faucet in the Kitchen (All Types)
Now, let’s get to the heart of the matter: fixing that leaky faucet! The following sections provide detailed instructions for repairing each type of faucet. **Always remember to shut off the water supply to the faucet before beginning any repairs.** You’ll find shut-off valves under the sink. Turn them clockwise until they are fully closed. Then, turn on the faucet to relieve any remaining pressure in the lines. Place a bucket under the sink to catch any drips.
Fixing a Leaky Compression Faucet
Compression faucets are the most common type of leaky faucet, and often the easiest to fix.
1. **Shut Off the Water Supply:** As mentioned above, locate and turn off the hot and cold water supply valves under the sink.
2. **Remove the Handles:** Typically, there’s a decorative cap on top of each handle. Pry it off with a flathead screwdriver. You’ll then see a screw that holds the handle in place. Remove the screw and pull off the handle.
3. **Loosen the Packing Nut:** Use an adjustable wrench to loosen the packing nut that holds the stem in place. Turn it counterclockwise.
4. **Remove the Stem:** Gently pull the stem straight up and out of the faucet body. You may need to wiggle it a bit.
5. **Inspect and Replace the Washer:** At the bottom of the stem, you’ll find a rubber washer held in place by a screw. Remove the screw and inspect the washer. If it’s worn, cracked, or damaged, replace it with a new washer of the same size and type. Plumber’s grease can be applied to the new washer to prolong its life and improve the seal.
6. **Inspect and Replace the Valve Seat (Optional):** The valve seat is the surface against which the washer presses. If it’s corroded or damaged, you can use a valve seat wrench to remove and replace it. This step can significantly extend the life of the repair.
7. **Replace the O-ring:** There’s usually an O-ring around the stem. Inspect it and replace it if it’s worn or damaged. Apply plumber’s grease to the new O-ring.
8. **Reassemble the Faucet:** Carefully reassemble the faucet in the reverse order of disassembly. Tighten the packing nut snugly, but not too tight. Replace the handles and secure them with the screws and decorative caps.
9. **Turn on the Water Supply:** Slowly turn on the water supply valves under the sink. Check for leaks around the handles and spout. If you see any leaks, tighten the packing nut slightly.
Fixing a Leaky Ball Faucet
Ball faucets are more complex than compression faucets, but with patience and careful attention to detail, you can fix them yourself.
1. **Shut Off the Water Supply:** As always, turn off the water supply valves under the sink.
2. **Loosen the Set Screw:** Locate the set screw on the side of the faucet handle. Use an Allen wrench to loosen the set screw and remove the handle.
3. **Loosen the Cap and Collar:** Use an adjustable wrench to loosen the cap and collar that holds the ball mechanism in place. Turn it counterclockwise.
4. **Remove the Ball and Stem Assemblies:** Carefully lift out the ball and stem assemblies. The stem assemblies are small plastic or rubber parts that control the water flow.
5. **Inspect and Replace the O-rings and Springs:** Inspect the O-rings and springs on the stem assemblies. If they are worn, cracked, or damaged, replace them with new ones. A faucet repair kit for ball faucets typically includes these parts.
6. **Inspect the Ball:** Inspect the ball for any signs of wear or damage. If it’s scratched or corroded, replace it with a new ball.
7. **Reassemble the Faucet:** Carefully reassemble the faucet in the reverse order of disassembly. Make sure the ball is properly aligned in the faucet body. Tighten the cap and collar snugly, but not too tight. Replace the handle and secure it with the set screw.
8. **Turn on the Water Supply:** Slowly turn on the water supply valves under the sink. Check for leaks around the handle and spout. If you see any leaks, tighten the cap and collar slightly.
Fixing a Leaky Cartridge Faucet
Cartridge faucets are relatively easy to repair, as the cartridge is a single unit that can be easily replaced.
1. **Shut Off the Water Supply:** Turn off the water supply valves under the sink.
2. **Remove the Handle:** Locate the set screw on the side of the faucet handle. Use an Allen wrench to loosen the set screw and remove the handle. Some cartridge faucets have a decorative cap that needs to be pried off to access the screw.
3. **Remove the Retaining Clip:** Underneath the handle, you’ll find a retaining clip that holds the cartridge in place. Use pliers or a screwdriver to carefully remove the retaining clip. Be careful not to damage the clip.
4. **Remove the Cartridge:** Once the retaining clip is removed, you should be able to pull the cartridge straight up and out of the faucet body. You may need to wiggle it a bit. If the cartridge is stuck, you can use a cartridge puller tool to help remove it.
5. **Install the New Cartridge:** Before installing the new cartridge, make sure it’s the correct type for your faucet. Align the new cartridge with the faucet body and push it down until it’s fully seated. Make sure the cartridge is oriented correctly – typically, there’s a notch or marking that indicates the correct orientation.
6. **Reinstall the Retaining Clip:** Reinstall the retaining clip to secure the cartridge in place.
7. **Reassemble the Faucet:** Reassemble the faucet in the reverse order of disassembly. Replace the handle and secure it with the set screw.
8. **Turn on the Water Supply:** Slowly turn on the water supply valves under the sink. Check for leaks around the handle and spout.
Fixing a Leaky Ceramic Disc Faucet
Ceramic disc faucets are known for their durability, but they can still leak occasionally. The repair process is similar to that of a cartridge faucet.
1. **Shut Off the Water Supply:** Turn off the water supply valves under the sink.
2. **Remove the Handle:** Locate the set screw on the side of the faucet handle. Use an Allen wrench to loosen the set screw and remove the handle. Some ceramic disc faucets have a decorative cap that needs to be pried off to access the screw.
3. **Remove the Escutcheon Cap:** Underneath the handle, you’ll find an escutcheon cap that covers the ceramic disc cartridge. Unscrew the escutcheon cap.
4. **Remove the Ceramic Disc Cylinder:** Carefully lift out the ceramic disc cylinder. This cylinder contains the ceramic discs that control water flow.
5. **Inspect and Clean the Ceramic Discs:** Inspect the ceramic discs for any signs of wear or damage. Clean the discs with white vinegar to remove any mineral deposits. Sometimes, simply cleaning the discs is enough to stop the leak.
6. **Replace the Ceramic Disc Cylinder (If Necessary):** If the ceramic discs are damaged, you’ll need to replace the entire ceramic disc cylinder. Make sure the new cylinder is the correct type for your faucet.
7. **Reassemble the Faucet:** Carefully reassemble the faucet in the reverse order of disassembly. Make sure the ceramic disc cylinder is properly aligned in the faucet body. Tighten the escutcheon cap snugly, but not too tight. Replace the handle and secure it with the set screw.
8. **Turn on the Water Supply:** Slowly turn on the water supply valves under the sink. Check for leaks around the handle and spout.
Troubleshooting Common Leaky Faucet Problems
Even with careful attention to detail, you may encounter some common problems when fixing a leaky faucet. Here are some troubleshooting tips:
* **Leak Persists After Replacing Washers/O-rings:** Make sure you used the correct size and type of replacement parts. Double-check that the valve seat is clean and smooth. Consider replacing the valve seat if it’s corroded.
* **Handle is Difficult to Remove:** Apply penetrating oil to the handle and let it sit for a few minutes. Use a handle puller tool if necessary.
* **Cartridge is Stuck:** Use a cartridge puller tool to remove the cartridge. Be careful not to damage the faucet body.
* **New Faucet Leaks:** Check all connections to make sure they are tight. Use plumber’s tape on threaded connections. Make sure the faucet is properly seated on the sink.
* **Water Pressure is Low After Repair:** Check the aerator for debris. Clean or replace the aerator if necessary.
If you’re still having trouble fixing your leaky faucet, don’t hesitate to call a qualified plumber. It’s better to err on the side of caution than to risk damaging your plumbing system.
The Economic and Environmental Benefits of Fixing a Leaky Faucet
Beyond the annoyance factor, fixing a leaky faucet offers significant economic and environmental benefits. A seemingly small drip can waste a surprising amount of water over time, leading to higher water bills and unnecessary strain on our water resources.
* **Reduced Water Bills:** A leaky faucet can waste hundreds or even thousands of gallons of water per year, significantly increasing your water bill. Fixing the leak can save you money on your monthly bill.
* **Water Conservation:** Water is a precious resource, and it’s important to conserve it whenever possible. Fixing a leaky faucet helps conserve water and reduce your environmental impact.
* **Prevention of Water Damage:** A persistent leak can cause water damage to your cabinets, floors, and walls. Fixing the leak can prevent costly repairs in the future.
* **Increased Home Value:** A well-maintained home is more valuable than one with neglected repairs. Fixing a leaky faucet can increase the value of your home.
By taking the time to fix a leaky faucet, you’re not only saving money and conserving water, but you’re also protecting your home and increasing its value. It’s a win-win situation!
Choosing the Right Replacement Parts: A Key to Success
Selecting the correct replacement parts is crucial for a successful and long-lasting faucet repair. Here are some tips for choosing the right parts:
* **Identify Your Faucet Type:** As mentioned earlier, knowing your faucet type is essential for selecting the correct replacement parts.
* **Consult Your Faucet’s Manual or Website:** The manufacturer’s manual or website will provide a list of compatible replacement parts.
* **Take the Old Parts with You to the Store:** This will help you match the size and type of replacement parts.
* **Purchase a Faucet Repair Kit:** A faucet repair kit typically includes all the necessary replacement parts for a specific faucet type.
* **Choose High-Quality Parts:** Opt for durable, high-quality replacement parts that will last longer and provide a better seal. According to expert plumbers, investing in quality parts is often more cost-effective in the long run.
By taking the time to choose the right replacement parts, you can ensure a successful and long-lasting faucet repair.
Preventative Maintenance: Keeping Your Faucet Leak-Free
Preventative maintenance is key to keeping your kitchen faucet leak-free and extending its lifespan. Here are some tips for maintaining your faucet:
* **Clean Your Faucet Regularly:** Clean your faucet regularly with a mild soap and water solution to remove mineral deposits and grime.
* **Check for Leaks Regularly:** Check your faucet for leaks regularly, even if you don’t notice any drips. Early detection can prevent small leaks from becoming big problems.
* **Lubricate Moving Parts:** Lubricate the moving parts of your faucet, such as the O-rings and washers, with plumber’s grease to keep them functioning smoothly.
* **Avoid Over-Tightening Handles:** Over-tightening the handles can damage the internal components of the faucet. Tighten the handles only until they are snug.
* **Replace Worn Parts Promptly:** Replace worn parts, such as washers and O-rings, promptly to prevent leaks and further damage.
By following these preventative maintenance tips, you can keep your kitchen faucet leak-free and extend its lifespan, saving you money and hassle in the long run.
When to Call a Professional Plumber
While many faucet repairs can be done DIY, there are certain situations where it’s best to call a professional plumber. Here are some signs that you need professional help:
* **You’re Not Comfortable Working with Plumbing:** If you’re not comfortable working with plumbing, it’s best to leave the repair to a professional.
* **You’ve Tried to Fix the Leak Yourself, But It’s Still Leaking:** If you’ve tried to fix the leak yourself, but it’s still leaking, there may be a more serious problem that requires professional attention.
* **The Faucet is Severely Damaged:** If the faucet is severely damaged, it may need to be replaced.
* **You Have Hard Water:** Hard water can cause mineral buildup that makes it difficult to repair faucets. A plumber can install a water softener to prevent future problems.
* **You’re Not Sure What’s Causing the Leak:** If you’re not sure what’s causing the leak, a plumber can diagnose the problem and recommend the best solution.
Calling a professional plumber can save you time, money, and frustration in the long run. It’s always better to err on the side of caution when dealing with plumbing issues.
Expert Advice: Preventing Future Leaks and Prolonging Faucet Life
To further extend the life of your kitchen faucet and minimize the risk of future leaks, consider these additional expert tips:
* **Install a Water Softener:** If you live in an area with hard water, installing a water softener can prevent mineral buildup that damages faucet components.
* **Use a Faucet Filter:** A faucet filter can remove sediment and other impurities from the water, protecting the faucet from damage.
* **Avoid Abrasive Cleaners:** Avoid using abrasive cleaners on your faucet, as they can scratch the finish and damage the internal components.
* **Don’t Let the Faucet Drip:** Even a small drip can waste a significant amount of water over time. Fix any leaks promptly to prevent further damage.
* **Consider Upgrading to a High-Quality Faucet:** If your faucet is old and prone to leaks, consider upgrading to a high-quality faucet that is designed to last.
By following these expert tips, you can prolong the life of your kitchen faucet and minimize the risk of future leaks. As plumbers often advise, proactive maintenance is the best way to avoid costly repairs.
Q&A: Addressing Your Leaky Faucet Questions
Here are some frequently asked questions about fixing leaky faucets, with expert answers to help you resolve your issues:
**Q1: How do I know what size replacement washers to buy?**
A1: The best way is to take the old washer with you to the hardware store. If that’s not possible, try to measure the inner and outer diameter of the washer as accurately as possible. Many faucet repair kits come with an assortment of common sizes.
**Q2: Can I use Teflon tape on all threaded connections?**
A2: Yes, Teflon tape (plumber’s tape) is recommended for sealing most threaded connections in plumbing. Wrap the tape around the threads in a clockwise direction, overlapping each layer slightly.
**Q3: What is the best way to remove mineral deposits from faucet parts?**
A3: Soaking the parts in white vinegar for several hours is an effective way to remove mineral deposits. For stubborn deposits, you can use a scrub brush or a small tool to gently scrape them away.
**Q4: How often should I replace the washers in my faucet?**
A4: The lifespan of washers depends on the quality of the washers and the frequency of use. As a general rule, it’s a good idea to inspect the washers every year or two and replace them if they show signs of wear or damage.
**Q5: My faucet is leaking from the base, not the spout. What could be the cause?**
A5: A leak from the base of the faucet often indicates a problem with the O-rings that seal the faucet to the sink. These O-rings can dry out and crack over time, allowing water to leak through. Replacing the O-rings is usually the solution.
**Q6: Is it safe to use a wrench on a plastic faucet part?**
A6: It’s generally not recommended to use a wrench directly on a plastic faucet part, as it can easily crack or break. If you need to tighten a plastic part, use a strap wrench or wrap the part with a cloth to protect it from damage.
**Q7: What is the purpose of plumber’s grease?**
A7: Plumber’s grease is a waterproof lubricant that is used to protect and extend the life of rubber and plastic parts in plumbing fixtures. It helps to prevent O-rings and washers from drying out, cracking, and sticking.
**Q8: My single-handle faucet is dripping even when the handle is in the off position. What could be the problem?**
A8: This is a common problem with single-handle faucets and is often caused by a worn or damaged cartridge. Replacing the cartridge is usually the solution.
**Q9: How do I know if I need to replace the entire faucet instead of just repairing it?**
A9: If the faucet is old, severely damaged, or has multiple problems, it may be more cost-effective to replace it entirely. Also, if replacement parts are difficult to find or are very expensive, it may be better to replace the entire faucet.
**Q10: Can I fix a leaky faucet if I have hard water?**
A10: Yes, you can fix a leaky faucet even if you have hard water. However, you may need to clean mineral deposits from the faucet parts more frequently. Installing a water softener can help to prevent future problems.
Conclusion: Taking Control of Your Kitchen Plumbing
Fixing a leaky faucet in the kitchen with easy DIY solutions is a manageable task that empowers you to save money, conserve water, and maintain your home. By understanding the anatomy of your faucet, gathering the right tools and materials, and following our step-by-step instructions, you can confidently tackle this common household problem. Remember to prioritize safety by shutting off the water supply before starting any repairs, and don’t hesitate to consult a professional plumber if you encounter any difficulties. Our experience shows that even a novice DIYer can successfully fix a leaky faucet with a little patience and the right guidance. The benefits of taking control of your kitchen plumbing extend beyond the immediate repair, fostering a sense of self-reliance and contributing to a more sustainable lifestyle. So, grab your tools, follow our guide, and say goodbye to that annoying drip once and for all!
We encourage you to share your experiences with how to fix a leaky faucet in the kitchen with easy diy solutions in the comments below! Your insights and tips can help other homeowners tackle this common problem. Explore our advanced guide to [related topic: ‘identifying different types of kitchen faucets’] for more in-depth information. Contact our experts for a consultation on how to fix a leaky faucet in the kitchen with easy diy solutions and ensure a long-lasting repair.
