# Ruger Mark II Disassembly: A Comprehensive Guide for Gun Owners
Are you looking to disassemble your Ruger Mark II pistol for cleaning, maintenance, or repair? This comprehensive guide will walk you through the entire process, step-by-step, with clear instructions and helpful tips. We’ll cover everything from essential safety precautions to advanced troubleshooting, ensuring you can confidently maintain your firearm. This guide aims to provide a resource that is not only comprehensive and easy to follow but also reflects expert knowledge and promotes safe gun handling practices. Our goal is to empower you with the knowledge and skills needed to properly disassemble and reassemble your Ruger Mark II, enhancing its performance and longevity.
## Why Disassemble Your Ruger Mark II?
The Ruger Mark II is a popular and reliable .22 LR pistol, known for its accuracy and durability. Regular disassembly and cleaning are crucial for maintaining its performance and preventing malfunctions. Disassembly allows you to:
* Remove accumulated dirt, grime, and powder residue.
* Inspect parts for wear and tear.
* Apply lubrication to critical components.
* Address potential issues before they escalate.
Neglecting proper maintenance can lead to reduced accuracy, feeding problems, and even damage to the firearm. Therefore, understanding how to disassemble your Ruger Mark II is an essential skill for any owner.
## Safety First: Essential Precautions
Before you even think about touching your Ruger Mark II, prioritize safety. Disassembly should only be performed in a safe environment, free from distractions. These safety precautions are paramount:
1. **Ensure the Firearm is Unloaded:** This is the most crucial step. Remove the magazine and visually inspect the chamber to confirm it’s empty. Do this twice.
2. **Wear Eye Protection:** Small parts and springs can sometimes eject forcefully during disassembly. Safety glasses will protect your eyes.
3. **Work in a Well-Lit Area:** Adequate lighting is essential for seeing small parts and performing tasks accurately.
4. **Use a Clean Work Surface:** A clean surface will prevent parts from getting lost and keep contaminants away from the firearm.
5. **Refer to the Owner’s Manual:** This guide is a supplement to, not a replacement for, the Ruger Mark II owner’s manual. Consult your manual for specific details and warnings.
**Disclaimer:** *Improper disassembly or reassembly can damage your firearm and may create a dangerous condition. If you are not comfortable performing these procedures, consult a qualified gunsmith.* We are not responsible for any damage or injury resulting from the use of this guide. Always prioritize safety and follow all applicable laws and regulations.
## Tools Needed for Ruger Mark II Disassembly
Having the right tools will make the disassembly process much easier and prevent damage to your firearm. Here’s a list of essential tools:
* **Screwdrivers:** A set of screwdrivers with various sizes of flathead and Phillips head tips.
* **Punch Set:** A set of punches, including a roll pin punch, is helpful for removing pins.
* **Hammer:** A small hammer, preferably with a nylon or brass head, for tapping punches.
* **Cleaning Supplies:** Gun cleaning solvent, brushes, patches, and a cleaning rod.
* **Lubricant:** Gun oil or grease specifically designed for firearms.
* **Small Container:** To keep small parts organized and prevent them from getting lost.
* **Soft Cloth or Towel:** To protect the finish of your firearm and provide a clean work surface.
## Step-by-Step Ruger Mark II Disassembly Guide
Now, let’s get into the actual disassembly process. Follow these steps carefully, referring to the images and diagrams provided (if any – this content is purely text-based for now). Remember, patience and attention to detail are key.
### 1. Field Stripping the Ruger Mark II
Field stripping is the basic level of disassembly required for routine cleaning and maintenance. It involves separating the major components of the firearm.
1. **Ensure the firearm is unloaded.** (Repeat this check!)
2. **Remove the Magazine:** Press the magazine release button and remove the magazine.
3. **Lock the Bolt Back:** Pull the bolt back and engage the bolt stop. This will hold the bolt in the open position.
4. **Remove the Mainspring Housing Latch:** Locate the mainspring housing latch at the rear of the grip frame. Pull it down and out.
5. **Remove the Mainspring Housing:** With the latch removed, the mainspring housing can now be pulled down and out of the grip frame. It might require a little wiggle.
6. **Separate the Upper Receiver:** With the mainspring housing removed, the upper receiver (the part containing the barrel and bolt) can now be separated from the grip frame. Slide it forward off the frame.
7. **Remove the Bolt:** With the upper receiver separated, you can now remove the bolt. Pull the bolt back and lift it out of the receiver.
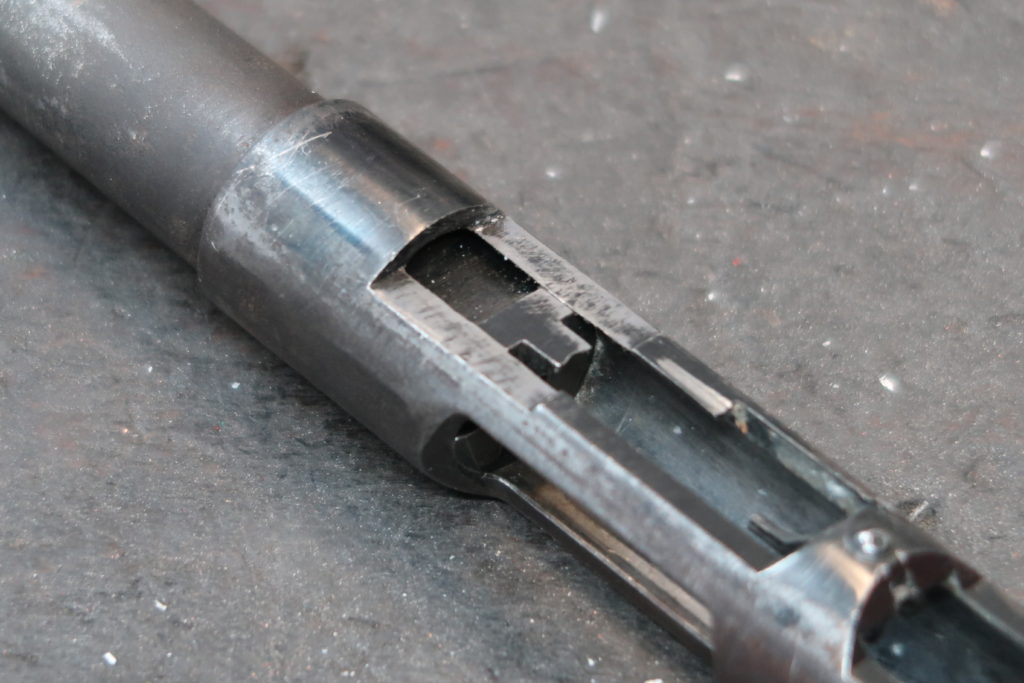
### 2. Detailed Bolt Disassembly
The bolt is a critical component of the Ruger Mark II, and detailed disassembly is necessary for thorough cleaning and inspection. This step requires more care.
1. **Locate the Firing Pin Retaining Pin:** This small pin holds the firing pin in place. It’s usually located on the rear of the bolt.
2. **Using a Punch, Carefully Drive Out the Firing Pin Retaining Pin:** Support the bolt on a solid surface and use a punch to gently drive out the retaining pin. Be careful not to damage the bolt.
3. **Remove the Firing Pin:** Once the retaining pin is removed, the firing pin can be pushed out from the rear of the bolt.
4. **Remove the Extractor:** The extractor is located on the side of the bolt. Use a small tool or punch to carefully pry it out. Be aware that the extractor is spring-loaded, so it may eject forcefully.
5. **Remove the Extractor Plunger and Spring:** Once the extractor is removed, you can remove the extractor plunger and spring from the bolt. These are small parts, so be careful not to lose them.
### 3. Magazine Disassembly
Disassembling the magazine allows you to clean the interior and ensure proper feeding. This is a relatively simple process.
1. **Locate the Magazine Base Plate Retaining Button:** This button is usually located on the bottom of the magazine.
2. **Press the Retaining Button:** Use a punch or small tool to press the retaining button.
3. **Slide the Base Plate Off:** While pressing the retaining button, slide the base plate off the magazine. Be careful, as the spring is under tension.
4. **Remove the Spring and Follower:** Once the base plate is removed, you can remove the spring and follower from the magazine body.
### 4. Cleaning and Inspection
With the Ruger Mark II disassembled, you can now clean and inspect the individual parts. Use gun cleaning solvent, brushes, and patches to remove dirt, grime, and powder residue.
* **Barrel Cleaning:** Use a cleaning rod and bore brush to clean the barrel. Follow up with patches until they come out clean.
* **Bolt Cleaning:** Clean the bolt thoroughly, paying attention to the firing pin channel and extractor area.
* **Frame Cleaning:** Clean the grip frame and upper receiver with a brush and solvent.
* **Magazine Cleaning:** Clean the magazine body, spring, and follower with solvent.
Inspect all parts for wear, damage, or cracks. Replace any worn or damaged parts as needed. Pay close attention to the firing pin, extractor, and springs. These are common wear items.
### 5. Reassembly: Putting It All Back Together
Reassembly is the reverse of disassembly. Follow these steps carefully, ensuring all parts are properly aligned and seated.
1. **Reassemble the Magazine:**
* Insert the spring and follower into the magazine body.
* Slide the base plate back onto the magazine, ensuring the retaining button clicks into place.
2. **Reassemble the Bolt:**
* Insert the extractor plunger and spring into the bolt.
* Install the extractor, ensuring it is properly seated.
* Insert the firing pin into the bolt.
* Reinstall the firing pin retaining pin, ensuring it is flush with the bolt surface.
3. **Reassemble the Upper Receiver:**
* Slide the bolt back into the upper receiver.
4. **Reassemble the Pistol:**
* Slide the upper receiver onto the grip frame.
* Reinstall the mainspring housing, ensuring it is properly seated.
* Reinstall the mainspring housing latch.
### 6. Function Check
After reassembly, it’s essential to perform a function check to ensure the firearm is operating correctly. This involves:
* **Checking the Safety:** Ensure the safety lever engages and disengages properly.
* **Checking the Trigger:** Ensure the trigger pulls smoothly and resets correctly.
* **Checking the Bolt:** Ensure the bolt cycles smoothly and locks back on an empty magazine.
**Important:** *Never load live ammunition during a function check. Use dummy rounds or snap caps.* If you encounter any issues during the function check, disassemble the firearm and recheck your work. If you are still unable to resolve the issue, consult a qualified gunsmith.
## Advanced Troubleshooting: Common Issues and Solutions
Even with careful disassembly and reassembly, you may encounter some common issues. Here are some troubleshooting tips:
* **Failure to Eject:** This can be caused by a dirty extractor, a worn extractor spring, or a dirty chamber. Clean the extractor and chamber thoroughly. Replace the extractor spring if it is weak.
* **Failure to Feed:** This can be caused by a dirty magazine, a weak magazine spring, or a dirty feed ramp. Clean the magazine and feed ramp. Replace the magazine spring if it is weak.
* **Light Strikes:** This can be caused by a dirty firing pin channel, a worn firing pin, or a weak hammer spring. Clean the firing pin channel thoroughly. Replace the firing pin or hammer spring if they are worn.
If you are unable to resolve these issues yourself, consult a qualified gunsmith.
## The Ruger Mark II: A Legacy of Excellence
The Ruger Mark II is more than just a pistol; it’s a testament to quality craftsmanship and enduring design. Its popularity among target shooters and plinkers alike speaks volumes about its reliability and accuracy. Understanding how to properly disassemble and maintain your Ruger Mark II is an investment in its longevity and performance. By following the steps outlined in this guide, you can ensure that your Ruger Mark II continues to provide years of reliable service.
## Expert Tips for Long-Term Maintenance
* **Regular Cleaning:** Clean your Ruger Mark II after each range session to prevent the buildup of dirt and grime.
* **Proper Lubrication:** Lubricate critical components with gun oil or grease to reduce friction and wear.
* **Inspect Regularly:** Inspect all parts for wear and damage on a regular basis. Replace worn or damaged parts promptly.
* **Use Quality Ammunition:** Use high-quality ammunition to ensure reliable performance and reduce the risk of malfunctions.
* **Store Properly:** Store your Ruger Mark II in a safe and dry place to prevent rust and corrosion.
## Ruger Mark II vs. Ruger Mark IV: A Comparison
The Ruger Mark IV is the successor to the Mark II, featuring a significant improvement in ease of disassembly. The Mark IV incorporates a one-button takedown system, simplifying the process considerably compared to the Mark II’s more involved procedure. While the Mark II requires removing the mainspring housing latch and separating the upper receiver, the Mark IV allows for quick disassembly with a simple push of a button. This makes the Mark IV more user-friendly for cleaning and maintenance. However, the Mark II remains a popular choice due to its proven reliability and classic design.
## The Importance of Proper Firearm Storage
Safe firearm storage is paramount for preventing accidents and unauthorized access. Always store your Ruger Mark II unloaded, in a secure location, away from children and unauthorized individuals. Consider using a gun safe or lockbox to provide an additional layer of security. Follow all applicable laws and regulations regarding firearm storage.
## Q&A: Your Ruger Mark II Disassembly Questions Answered
Here are some frequently asked questions about Ruger Mark II disassembly:
**Q1: How often should I disassemble my Ruger Mark II for cleaning?**
*A1: It depends on how often you shoot it. If you shoot frequently (e.g., weekly), disassemble and clean it after each range session. If you shoot less frequently (e.g., monthly), disassemble and clean it every few months. At a minimum, disassemble and clean it annually.*
**Q2: What type of lubricant should I use on my Ruger Mark II?**
*A2: Use a gun oil or grease specifically designed for firearms. Avoid using general-purpose lubricants, as they may not provide adequate protection or may damage the firearm. Brands like Hoppe’s No. 9, CLP BreakFree, and Lucas Oil Gun Oil are good choices.*
**Q3: Can I use ultrasonic cleaning on my Ruger Mark II parts?**
*A3: Yes, but with caution. Ultrasonic cleaning can be effective for removing stubborn carbon buildup, but it can also damage certain finishes. Avoid using harsh chemicals in the ultrasonic cleaner. Always lubricate the parts after ultrasonic cleaning.*
**Q4: What should I do if I lose a small part during disassembly?**
*A4: Stop the disassembly process and search thoroughly for the missing part. If you cannot find it, contact Ruger or a gunsmith to order a replacement part. Do not attempt to reassemble the firearm without all of the necessary parts.*
**Q5: How do I know if a part is worn and needs to be replaced?**
*A5: Inspect all parts for wear, damage, or cracks. Pay close attention to the firing pin, extractor, and springs. Common signs of wear include rounded edges, cracks, and weakened springs. If you are unsure, consult a gunsmith.*
**Q6: Is it necessary to disassemble the entire pistol for routine cleaning?**
*A6: No, field stripping is usually sufficient for routine cleaning. Detailed disassembly is only necessary for more thorough cleaning or when addressing specific issues.*
**Q7: What is the best way to remove carbon buildup from the barrel?**
*A7: Use a bore brush and gun cleaning solvent specifically designed for removing carbon buildup. You may need to scrub the barrel several times to remove all of the carbon.*
**Q8: How do I prevent rust from forming on my Ruger Mark II?**
*A8: Clean and lubricate your Ruger Mark II regularly. Store it in a safe and dry place. Consider using a rust preventative spray or wipe.*
**Q9: What is the proper torque for tightening screws on my Ruger Mark II?**
*A9: Refer to the Ruger Mark II owner’s manual for specific torque specifications. Over-tightening screws can damage the firearm.*
**Q10: Where can I find replacement parts for my Ruger Mark II?**
*A10: Contact Ruger directly or a reputable gun parts supplier. Brownells and MidwayUSA are good options.*
## Conclusion: Mastering Ruger Mark II Disassembly
By following this comprehensive guide, you can confidently disassemble, clean, and maintain your Ruger Mark II pistol. Regular maintenance will ensure its reliable performance and extend its lifespan. Remember to always prioritize safety and consult a qualified gunsmith if you have any questions or concerns. The Ruger Mark II is a fine firearm, and with proper care, it will provide years of enjoyment. Now, share your experiences with Ruger Mark II disassembly in the comments below! What tips or tricks have you learned over the years? Let’s build a community of knowledgeable and responsible gun owners.
