
Clean Inside Kitchen Cabinets: The Definitive Guide to Sparkling Cleanliness
Keeping your kitchen cabinets clean, especially the inside, is often overlooked, but it’s a critical part of maintaining a healthy and hygienic home. Food spills, crumbs, and dust can accumulate quickly, creating an environment for bacteria, mold, and pests. This comprehensive guide provides expert advice and step-by-step instructions on how to effectively clean inside kitchen cabinets, ensuring a fresh and sanitary space. We’ll cover everything from preparation and necessary supplies to specific cleaning techniques and preventative measures, offering valuable insights gained from years of experience in home cleaning and organization. This isn’t just about surface-level cleaning; it’s about creating a truly clean and healthy kitchen environment.
Why Cleaning Inside Kitchen Cabinets Matters: More Than Just Aesthetics
Cleaning inside your kitchen cabinets is more than just about appearances; it’s a vital aspect of home hygiene and food safety. Here’s a deeper look at why it’s so important:
* Preventing Pest Infestations: Crumbs and food residue are magnets for pests like ants, cockroaches, and rodents. Regularly cleaning the inside of your cabinets removes these attractants, preventing infestations that can contaminate your food and spread disease.
* Controlling Mold and Mildew Growth: Dampness and spills can create a breeding ground for mold and mildew, especially in dark, enclosed spaces like kitchen cabinets. Mold can trigger allergies, respiratory problems, and other health issues. Cleaning and disinfecting your cabinets helps prevent mold growth and maintains a healthy indoor environment.
* Eliminating Bacteria and Germs: Kitchen cabinets can harbor bacteria and germs from food packaging, spills, and dirty hands. These microorganisms can contaminate your food and lead to illness. Cleaning and sanitizing your cabinets eliminates these harmful pathogens, protecting your family’s health.
* Extending the Lifespan of Your Cabinets: Built-up grime and spills can damage the finish and material of your cabinets over time. Regular cleaning prevents this damage and extends the lifespan of your cabinets, saving you money on repairs or replacements.
* Improving Food Storage Hygiene: Clean cabinets provide a sanitary environment for storing food items, preventing cross-contamination and ensuring food safety. This is especially important for storing dry goods like flour, sugar, and spices, which can easily absorb odors and contaminants.
The Hidden Dangers of Neglecting Cabinet Interiors
Neglecting the interiors of your kitchen cabinets can lead to a variety of unseen problems. Here are a few of the most common:
* Allergen Buildup: Dust, pollen, and pet dander can accumulate inside cabinets, triggering allergies and respiratory problems, especially for individuals with sensitivities.
* Unpleasant Odors: Spilled food and accumulated grime can create unpleasant odors that permeate your kitchen and affect the taste of your food.
* Cross-Contamination: Dirty cabinets can contaminate clean food items, especially if you’re storing opened packages or leftovers.
* Damage to Cabinet Materials: Certain spills, like acidic liquids or sugary substances, can damage the finish or material of your cabinets if left uncleaned.
Essential Supplies for Cleaning Inside Kitchen Cabinets: Setting Yourself Up for Success
Before you begin cleaning, gather all the necessary supplies to ensure a smooth and efficient process. Here’s a comprehensive checklist:
* Empty Containers: Have boxes or bags on hand to temporarily store the contents of your cabinets while you clean.
* Vacuum Cleaner with Attachments: A vacuum cleaner with a hose and brush attachments is essential for removing loose crumbs, dust, and debris from the inside of your cabinets. A handheld vacuum can also be useful.
* Cleaning Cloths or Microfiber Towels: Use soft, lint-free cloths or microfiber towels to wipe down the surfaces of your cabinets. Avoid using abrasive materials that can scratch the finish.
* Sponges: Sponges are useful for scrubbing stubborn stains and grime. Choose non-abrasive sponges to avoid damaging your cabinets.
* Bucket: A bucket is needed for mixing cleaning solutions.
* Cleaning Solutions: Choose appropriate cleaning solutions based on the type of cabinets you have. Here are a few options:
* All-Purpose Cleaner: A mild all-purpose cleaner is suitable for most types of cabinets.
* Dish Soap: A diluted solution of dish soap and warm water is a gentle and effective cleaner for removing grease and grime.
* Vinegar: White vinegar is a natural disinfectant and degreaser. Mix equal parts vinegar and water for a versatile cleaning solution. Be cautious using vinegar on waxed surfaces.
* Baking Soda: Baking soda is a mild abrasive that can be used to scrub stubborn stains. Make a paste of baking soda and water for spot cleaning.
* Wood Cleaner: If you have wood cabinets, use a wood cleaner specifically designed for cabinets to avoid damaging the finish.
* Spray Bottle: A spray bottle is helpful for applying cleaning solutions evenly.
* Rubber Gloves: Protect your hands from harsh cleaning chemicals and potential irritants by wearing rubber gloves.
* Trash Bags: Dispose of any trash or expired food items you find inside your cabinets.
* Old Toothbrush: An old toothbrush is useful for cleaning hard-to-reach areas and crevices.
* Protective Sheet or Drop Cloth: Place a protective sheet or drop cloth on the floor in front of your cabinets to catch spills and prevent damage.
Step-by-Step Guide to Cleaning Inside Kitchen Cabinets: A Proven Method
Follow these step-by-step instructions for effectively cleaning inside your kitchen cabinets:
1. Empty the Cabinets: Remove all items from the cabinets, including food, dishes, and appliances. This allows you to thoroughly clean every surface.
2. Inspect the Contents: As you remove items from the cabinets, inspect them for signs of damage, spoilage, or contamination. Discard any expired food, broken dishes, or items that are no longer needed.
3. Vacuum the Interior: Use a vacuum cleaner with a hose and brush attachments to remove loose crumbs, dust, and debris from the inside of the cabinets. Pay attention to corners, crevices, and shelves.
4. Prepare Cleaning Solution: Choose an appropriate cleaning solution based on the type of cabinets you have. Mix the solution according to the manufacturer’s instructions or use one of the homemade solutions mentioned earlier.
5. Wipe Down Surfaces: Dip a clean cloth or sponge into the cleaning solution and wring out excess liquid. Wipe down all surfaces of the cabinets, including the walls, shelves, and doors. Pay attention to areas with spills, stains, or grime.
6. Scrub Stubborn Stains: For stubborn stains, use a non-abrasive sponge or a paste of baking soda and water to gently scrub the affected area. Avoid using excessive force, which can damage the finish of your cabinets.
7. Rinse with Clean Water: After cleaning, rinse the surfaces of the cabinets with a clean, damp cloth to remove any residue from the cleaning solution.
8. Dry Thoroughly: Use a clean, dry cloth to thoroughly dry the inside of the cabinets. Moisture can promote mold and mildew growth.
9. Sanitize (Optional): For extra hygiene, you can sanitize the inside of your cabinets with a disinfectant spray or a solution of diluted bleach (follow manufacturer’s instructions carefully and ensure proper ventilation).
10. Replace Shelf Liners (Optional): If you use shelf liners, replace them with clean ones. This helps prevent future spills and stains from damaging your cabinets.
11. Organize and Restock: Once the cabinets are completely dry, organize and restock them with your food, dishes, and appliances. Consider using organizers to maximize space and keep items tidy.
Specific Cleaning Techniques for Different Cabinet Materials
The best cleaning method depends on the material of your kitchen cabinets. Here’s a breakdown:
* Wood Cabinets: Use a wood cleaner or a mild solution of dish soap and water. Avoid using excessive water, which can damage the wood. Dry thoroughly after cleaning. Consider using a wood polish to protect the finish.
* Laminate Cabinets: Use an all-purpose cleaner or a solution of dish soap and water. Laminate is durable and easy to clean, but avoid using abrasive cleaners that can scratch the surface.
* Metal Cabinets: Use an all-purpose cleaner or a solution of dish soap and water. Metal cabinets are resistant to moisture and stains, but avoid using abrasive cleaners that can scratch the finish.
* Glass-Front Cabinets: Use a glass cleaner to clean the glass panels. For the frames, use the appropriate cleaning solution for the frame material (wood, laminate, or metal).
Best Cleaning Products for Kitchen Cabinets: Expert Recommendations
Choosing the right cleaning products can make a significant difference in the effectiveness and ease of cleaning your kitchen cabinets. Here are some expert recommendations:
* For General Cleaning:
* Method All-Purpose Cleaner: A plant-based cleaner that’s safe for most surfaces and leaves a fresh scent.
* Mrs. Meyer’s Clean Day Multi-Surface Everyday Cleaner: A gentle and effective cleaner with a variety of pleasant scents.
* For Grease and Grime:
* Dawn Ultra Dishwashing Liquid: A powerful degreaser that’s safe for most surfaces when diluted with water.
* Simple Green All-Purpose Cleaner: A non-toxic and biodegradable cleaner that’s effective at removing grease and grime.
* For Wood Cabinets:
* Howard Feed-N-Wax Wood Polish & Conditioner: A wood polish and conditioner that helps protect and restore the finish of wood cabinets.
* Weiman Furniture Cream: A cream polish that cleans, polishes, and protects wood surfaces.
Preventative Measures to Keep Kitchen Cabinets Clean Longer: Proactive Strategies
Preventing messes and spills is the best way to keep your kitchen cabinets clean. Here are some preventative measures you can take:
* Use Shelf Liners: Shelf liners protect the surfaces of your cabinets from spills and stains. Choose washable or disposable liners for easy cleanup.
* Wipe Up Spills Immediately: Clean up spills as soon as they occur to prevent them from drying and becoming difficult to remove.
* Store Food Properly: Store food in airtight containers to prevent leaks and spills. Label containers with the contents and expiration date.
* Regularly Check for Expired Food: Periodically check your cabinets for expired food and discard it to prevent contamination and unpleasant odors.
* Avoid Overfilling Cabinets: Overfilled cabinets can make it difficult to access items and increase the risk of spills and accidents.
* Use Cabinet Organizers: Cabinet organizers can help you maximize space and keep items tidy, making it easier to clean and maintain your cabinets.
* Ventilate Your Kitchen: Proper ventilation helps prevent moisture buildup, which can lead to mold and mildew growth in your cabinets.
Expert Tips and Tricks for Cleaning Inside Kitchen Cabinets: Going Beyond the Basics
Here are some expert tips and tricks to help you achieve sparkling clean kitchen cabinets:
* Use a Magic Eraser: Magic Erasers are effective at removing stubborn stains and scuff marks from cabinet surfaces. Test in an inconspicuous area first to ensure it doesn’t damage the finish.
* Clean Hardware Separately: Remove cabinet knobs and pulls and clean them separately with a metal cleaner or a solution of dish soap and water. This will remove grime and restore their shine.
* Use a Hair Dryer to Remove Stickers: Use a hair dryer to heat up stickers and labels before peeling them off. This will soften the adhesive and prevent it from leaving a sticky residue.
* Deodorize with Baking Soda: Place an open box of baking soda inside your cabinets to absorb odors and keep them smelling fresh.
* Use Essential Oils: Add a few drops of essential oil to your cleaning solution for a pleasant scent and added cleaning power. Lemon, tea tree, and lavender oils are all good choices.
Addressing Common Cabinet Cleaning Challenges: Troubleshooting Guide
Even with the best techniques, you might encounter some challenges while cleaning your kitchen cabinets. Here’s a troubleshooting guide to help you overcome common issues:
* Grease Buildup: Use a degreasing cleaner or a solution of dish soap and hot water to remove grease buildup. For stubborn grease, let the cleaner sit for a few minutes before wiping it away.
* Mold and Mildew: Clean the affected area with a solution of diluted bleach (follow manufacturer’s instructions carefully and ensure proper ventilation). Make sure to dry the area thoroughly to prevent regrowth.
* Sticky Residue: Use a solution of vinegar and water or a commercial adhesive remover to remove sticky residue from labels or spills.
* Water Stains: Use a wood cleaner or a furniture polish to remove water stains from wood cabinets. You may need to apply multiple coats to restore the finish.
* Scratches: Use a furniture repair marker or a touch-up paint to conceal scratches on cabinet surfaces. Choose a color that matches your cabinets.
Q&A: Your Kitchen Cabinet Cleaning Questions Answered
Here are some frequently asked questions about cleaning inside kitchen cabinets:
1. How often should I clean inside my kitchen cabinets?
* Ideally, you should aim to clean inside your kitchen cabinets at least every 3-6 months, or more frequently if you notice spills, crumbs, or signs of pests.
2. What’s the best way to clean sticky residue inside cabinets?
* A mixture of equal parts white vinegar and warm water is often effective. Apply, let it sit for a minute, and then wipe clean. For tougher residue, try a commercial adhesive remover.
3. Is it safe to use bleach inside kitchen cabinets?
* Yes, but use it sparingly and diluted (follow the product’s instructions). Ensure good ventilation and rinse thoroughly with clean water afterward. Always wear gloves.
4. How can I prevent pests from getting into my kitchen cabinets?
* Store food in airtight containers, clean up spills immediately, and regularly vacuum inside your cabinets. Consider using natural pest repellents like bay leaves or peppermint oil.
5. What’s the best way to deodorize kitchen cabinets?
* Place an open box of baking soda inside the cabinet, or use a charcoal-based odor absorber. You can also wipe down the interior with a solution of vinegar and water.
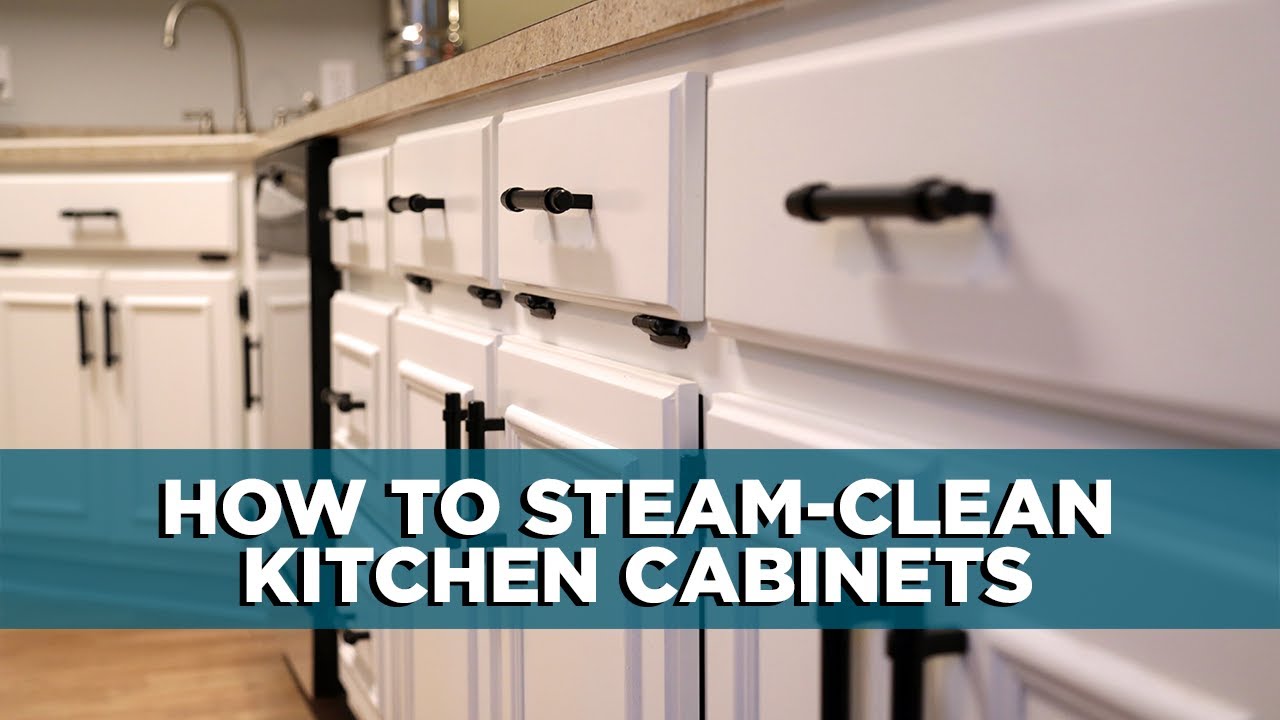
6. Can I use a steam cleaner inside my kitchen cabinets?
* It depends on the cabinet material. Avoid using steam cleaners on wood cabinets, as the moisture can damage the wood. Laminate and metal cabinets can usually be steam cleaned safely.
7. How do I clean the inside of drawers in my kitchen cabinets?
* Remove the drawer completely, vacuum out any debris, and wipe down the interior with a cleaning solution. Allow the drawer to dry completely before replacing it.
8. What kind of shelf liners are best for kitchen cabinets?
* Consider non-adhesive shelf liners for easy removal and cleaning. Choose liners that are waterproof and stain-resistant.
9. How can I make my own natural kitchen cabinet cleaner?
* Combine equal parts white vinegar and water, or mix a few drops of dish soap with warm water. You can also add a few drops of essential oil for a pleasant scent.
10. How do I prevent mold from growing inside my kitchen cabinets?
* Ensure proper ventilation in your kitchen, clean up spills immediately, and dry the inside of your cabinets thoroughly after cleaning. Consider using a dehumidifier in humid climates.
Conclusion: Maintaining a Clean and Healthy Kitchen Starts Inside Your Cabinets
Cleaning inside your kitchen cabinets is an essential task that contributes to a healthier and more hygienic home. By following the steps outlined in this guide, you can effectively remove dirt, grime, and potential hazards, ensuring a clean and safe environment for food storage and preparation. Remember that consistent cleaning and preventative measures are key to maintaining sparkling clean cabinets and a healthy kitchen. Now that you are armed with the knowledge and techniques, it’s time to tackle those cabinets and transform your kitchen into a spotless and organized space. Share your experiences with cleaning inside kitchen cabinets in the comments below! Explore our advanced guide to kitchen organization for even more tips and tricks to optimize your kitchen space.
